

Introduction Kali Linux for Beginners
You might have heard about hacking many times on social media apps like Instagram, Twitter, YouTube, and news websites. News channels often report that a company got hacked, causing a loss of millions of dollars, or that a government institution’s computer system was hacked, affecting thousands of computers. You may have also come across terms like phishing, malware, and ransomware in such reports.
Many people watch these news stories and think, “I also want to learn hacking! But what exactly is hacking?” Some even try random things like opening Facebook, experimenting on accounts, or using tools in Chrome, but they fail because they don’t really understand what hacking is.
Some of my students also asked me, “Sir, we have heard a lot about hacking, but we don’t know what it really is. We have tried different methods, but nothing works.” Before I explain further, let me make one thing clear—hacking without permission is illegal. However, since many people are curious about hacking, I want to share some important information in this post.
Kali Linux is an operating system used by cybersecurity experts, ethical hackers, and penetration testers. You may be wondering, “Is this the same software that hackers use to steal data and hack computers?” Yes, it is! But Kali Linux is not only used for hacking; it is also used for security testing to protect systems from hackers.
In this post, I will tell you about Kali Linux for beginners.
- What is Kali Linux?
- How to install it on your system
- Which security tools are available in Kali Linux?
- How you can use it to protect your system from being hacked
So, let’s start exploring Kali Linux and understanding how it works!
What is Kali Linux?

Think of Kali Linux as a powerful weapon that hackers use to break into systems. It can be used in two ways: for good purposes (like cybersecurity and ethical hacking) or for bad purposes (illegal hacking). However, bad actions always have bad consequences, while good actions lead to success. Kali Linux is mainly used for security testing and hacking research. It was created in 2013, and since then, it has become very popular among security experts. It offers advanced tools that can help you build a successful career in cybersecurity. With the right skills, you can work in companies, security firms, or government agencies.
Special Features of Kali Linux
- 600+ Built-in Security Tools When you install Kali Linux, it comes with over 600 security and hacking tools for penetration testing and cybersecurity research.
- Always Updated: Kali Linux follows a rolling update system, meaning it always stays up to date with the latest security features.
- Customizable: You can modify and use it according to your needs.
- Strong Community Support: Large security communities and experts provide help and support. If you face any issues, Offensive Security and the Kali Linux community can assist you.
With these features, Kali Linux is a powerful system that can help you become an expert in cybersecurity.
Key Features of Kali Linux
1. Pre-installed security tools
Kali Linux has more than 600 security tools. Some of these tools are used for network security, helping to identify weaknesses and perform security checks.
For example, some tools scan networks to check for security flaws. Just like security teams use monitors or drones to observe an area from hundreds of kilometers away and detect any possible threats, exploitation frameworks in Kali Linux help identify cyber threats before or during an attack.
One such tool is Metasploit, which is used to test security vulnerabilities and detect attacks.
- Digital Forensics Tools
The term “digital forensics” itself explains that these tools are used for investigating data. They help analyze systems and detect security issues. Some common digital forensics tools in Kali Linux include:
- Autopsy
- Sleuth Kit
- Wireless Attack Tools
These tools are used to test wireless network security and detect weaknesses. One such tool is:
Aircrack: This tool helps analyze and test wireless security.
- Password Cracking Tools
These tools check the strength of passwords and can also be used to crack weak passwords. Some well-known password cracking tools in Kali Linux are:
- John the Ripper used to find weak passwords.
- Hashcat is a powerful tool for breaking encrypted passwords.
These tools are essential for cybersecurity experts and help in identifying and fixing security weaknesses in networks, systems, and passwords.
2. Multi-platform support
Kali Linux has a great advantage—it can easily run on laptops, PCs, Raspberry Pis, and other ARM devices. This makes it a great option for different types of systems.
3. Live boot and installation option
One of the most important features is that if you don’t want to install it on your laptop, PC, or any other device, or if you feel unsure about installing it, you can run it in live mode without installing it. This means that you can use it directly from a USB, DVD, or virtual machine without making any changes to your system. And when you are ready, you can install it manually and use it permanently.
4. Excellent security and anonymity features
Another important feature is its strong privacy and security. It supports Tor and VPN by default, which helps protect your internet traffic from unwanted tracking and ensures your online activities remain secure.
5. Regular updates and support
One of its best features is that it receives regular updates. When you open the terminal, you see “kali@kali” displayed, but sometimes when installing software, you might face errors. However, if you use the “sudo su” command, you can install software smoothly and get access to the latest security features and hacking tools. Kali Linux is designed to handle modern cyber threats effectively.
Installing Kali Linux for Beginners: Step-by-Step Guide
If you are a beginner and don’t know how to install Kali Linux, don’t worry! This guide will take you through the installation process step by step.
Before installing Kali Linux, it is important to check whether your system meets the minimum requirements. This will help you determine if your computer or laptop can run Kali Linux properly.
System Requirements
- RAM (memory): Your laptop or computer should have at least 2 GB of RAM.
- Disk Space: A minimum of 20 GB of free disk space is required.
- Processor: Your processor should be at least 1 GHz or faster for smooth performance.
However, for better performance, it is recommended to have:
- More RAM (at least 4GB or more).
- More disk space (at least 50 GB or more).
- A multi-core processor for better speed.
Installation Methods
- 1. Installing Kali Linux on a Virtual Machine (Best for Beginners)
For beginners, installing Kali Linux on a virtual machine (VM) is the safest and easiest method. This method does not harm your system and allows you to use Kali Linux in a secure environment.
To install Kali Linux using a virtual machine, follow these steps:
- Download Virtual Machine Software
- You need to download and install either VirtualBox or VMware. These are popular tools that allow you to run an operating system inside your current system.
- Download Kali Linux ISO File
- Go to the official Kali Linux website by searching “Kali Linux download” on Google.
- Click on the official website link and download the Installer Image (ISO file).
- The file size is around 4.8 GB, so make sure you have enough space.
- Set Up a Virtual Machine
- Open VirtualBox or VMware.
- Click on “New” to create a new virtual machine.
- Select the downloaded Kali Linux ISO file.
- Allocate RAM (at least 2GB or more) and disk space (at least 20GB or more).
- Install Kali Linux
- Follow the on-screen instructions to install Kali Linux in the virtual machine.
- Configure network settings after installation.
- Install Microsoft C++ (If Needed)
- Sometimes, errors may occur while setting up the virtual machine.
- If needed, install Microsoft C++ Redistributable, which helps run some programs smoothly.
- Test Security Tools
- Once installed, you can start using Kali Linux and test different security tools in a safe and controlled environment.
Why Use a Virtual Machine?
- It allows you to use Kali Linux without affecting your main operating system.
- It is safe and secure for beginners.
- You can easily delete or reset the virtual machine if needed.
By following this method, you can start using Kali Linux without any risk to your Windows system. Happy learning!
- Advantages: No risk to your system, can run alongside Windows, and provides a safe learning environment.
- Disadvantages: requires more system resources and may run slower on older computers.
Dual Boot (Installing with Windows)
If you already know about Kali Linux, understand how to use it, and are aware of its advantages and disadvantages, then you can install it without much difficulty. However, you might be facing a problem: what if you want to use both Kali Linux and Windows? You may think about buying a new laptop, but there’s no need for that. You can install Kali Linux permanently while keeping Windows on the same device. To do this, you need to install Kali Linux using the dual boot method.
Steps to Install Dual Boot:
- Create a Partition: Before installing Kali Linux, you need to create a partition on your hard drive. This will allow you to allocate space specifically for Kali Linux and its applications.
- Download the Kali Linux ISO File: Visit the official website of Kali Linux and download the ISO file. The file size is about 4.0 GB.
- Create a Bootable USB: To install Kali Linux, you need to create a bootable USB. You can use software like Rufus or Balena Etcher to transfer the ISO file to a USB drive.
- Attach the USB and Start Installation: Insert the bootable USB into your computer and restart it. Follow the installation steps carefully.
- Choose the Dual Boot Option: During installation, you will see an option to install Kali Linux alongside Windows. Select this option to keep both operating systems on your device.
- Complete the Installation: Once the installation is complete, restart your device. When you turn it on, you will see a menu asking whether you want to boot into Windows or Kali Linux. You can select whichever system you want to use.
Advantages & Disadvantages:
- Advantages: You can use both Windows and Kali Linux on the same device. This gives you flexibility and better performance.
- Disadvantages: If you make a mistake during installation, your data may be lost. Also, the installation process takes some time.
By following these steps, you can easily set up a dual boot system and use both operating systems as needed.
My suggestion
Using Kali Linux for beginners can be difficult. There is no need to worry! I have some students who had no knowledge about Kali Linux, but they are still working on it.
There are some free official websites like TryHackMe and Hack The Box, where you can log in and learn about it.
You can also search on YouTube for “Kali Linux for Beginners”. You will find a lot of helpful videos that explain everything in detail. 😊
Use Kali Linux Without Installing It!
The interesting thing is that you can use Kali Linux without installing it! This is the best method for beginners, as they can learn and explore without making any changes to their computer.
You can use Kali Linux in Live USB Mode, which allows you to access all its features without installing it on your system.
Steps to Use Kali Linux in Live Mode:
- Download the Kali Linux ISO File: Visit the official Kali Linux website and download the ISO file. You will find it after scrolling down a little.
- Create a Bootable USB: Use a tool like Rufus to create a bootable USB. This step is very important.
- Attach the USB to Your Computer: Once the bootable USB is ready, insert it into your computer and select the Live Mode option.
- Start Kali Linux in Live Mode: When you choose the Live Option, Kali Linux will run directly from the USB. Nothing will be installed on your computer.
Think of it like watching a live cricket match on your mobile app without downloading the full match. Similarly, in Live Mode, Kali Linux runs directly from the USB without making changes to your system.
Advantages & Disadvantages:
Advantages:
- You can use Kali Linux without installing it.
- Your system remains unchanged.
- When you remove the USB, Kali Linux disappears, and your system goes back to normal.
Disadvantages:
- You need to boot from the USB every time you want to use Kali Linux.
- Any saved data is lost once you remove the USB.
This method is perfect for beginners who want to explore Kali Linux without making permanent changes to their system!
(First-Time Setup) Kali Linux for Beginners
- Important Settings After Installing Kali Linux for Beginners
When you install Kali Linux, there are some important initial settings that you must configure. This is especially important for beginners who are not familiar with the system.
Step 1: Update the System
After installing Kali Linux, the first thing you need to do is update the system.
When you open Kali Linux, you will see a Terminal window. In this terminal, you need to enter a command to update all features and packages.

Updating is necessary because it ensures that you have the latest security patches and software. 🚀
2. Create a New User Account (Important for Security)
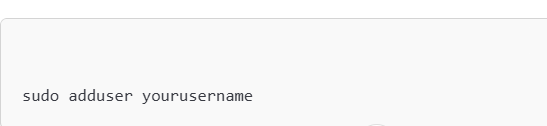
The second step is to create a new user account.
When you install Kali Linux, the default user is “Root”. However, this can be dangerous for security because the root account is easier to hack. If someone gains access, they can control the entire system.
That’s why creating a new user account is very important for security. To do this, you need to enter a command that will create your new user account. 🔒
- Then give the user sudo permissions:

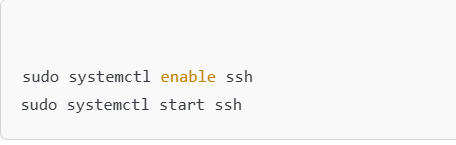
- Configure SSH and firewall settings
- Remote Access and Firewall Settings
There is another important feature in Kali Linux. If you want to work manually, that’s fine, but remote access is also available.
If you want to enable remote access, you need to follow the SSH (Secure Shell) process.
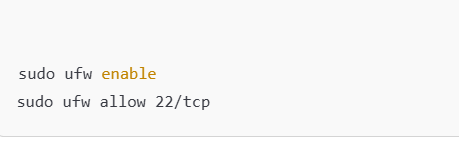
- Additionally, there is an important firewall setting to enhance security. To configure the firewall, you need to use a specific command. 🔒
Basic Settings in Kali Linux
When you start working on Kali Linux, it is important to understand some basic settings. One of the most essential tools in Kali Linux is the terminal. Many advanced users know how to use it, but beginners might find it difficult. That’s why learning basic commands is very important.
Basic Linux Commands
- ls: Shows files and folders inside a directory
- cd: Moves to another folder
- pwd: Displays the current folder location
- sudo: Runs commands with admin privileges
- apt install: Installs new software
Understanding the Desktop Environment
Did you know that Kali Linux supports different desktop environments? These are the graphical interfaces that you interact with when using the system. Some of the most popular environments include:
- GNOME: A modern and visually appealing interface
- Xfce: The default environment, known for being lightweight and fast
- KDE: A great choice for customization
If your system is low on resources and cannot handle heavy applications, then Xfce is the best option for a smooth Kali Linux experience.
- Using the Terminal
Did you know that most cybersecurity professionals and ethical hackers rely on the terminal to secure networks and perform security tests?
- Shortcut: You can quickly open the terminal by pressing Ctrl + Alt + T on your keyboard.
If you want to automate repetitive tasks, you should learn Bash scripting. It helps in saving time and making your system more efficient.
This was a basic introduction to Kali Linux to help you get started easily.
Learning Resources and Community Support
Learn Kali Linux with Online Courses
To properly learn Kali Linux, you may need to take online courses. While beginners can understand the basics, they might still struggle with some advanced topics.
I have advised some of my students to take online courses, and they found them very helpful. Below, I have listed some websites that provide online courses on Kali Linux and cybersecurity.
To start learning, you will need to create an account on these websites. Once you log in, you will receive online lectures that will help you understand cybersecurity, Linux commands, and security tools. These courses will also teach you how to use different security tools and run various commands in Kali Linux.
Start learning today and improve your cybersecurity skills!
Online Courses & Certifications
- Offensive Security Certified Professional (OSCP)
- TryHackMe & Hack The Box
- Udemy & Coursera Kali Linux Courses
Official website links
Conclusion
Kali Linux for Beginners – A Complete Guide In this post, I have explained what Kali Linux is, how it works, and the basic commands you need to know. These commands will help you update the system, follow or unfollow certain settings, and manage tools effectively.
If you want to install Kali Linux permanently on your computer or laptop, you can do so. However, if you don’t want to install it permanently, you can use it directly from a bootable USB without installing it on your system.
Everything I have shared in this post is based on my personal experience and research. This guide is specifically for beginners who want to learn how to use Kali Linux.
- Important Note
Kali Linux is a legal tool meant for ethical hacking and cybersecurity purposes. Do not use it for illegal activities. If you use it for unlawful purposes, I will not be responsible, and you may face legal consequences.
- Additional Resources
I will also share some helpful videos in Urdu that will guide you through the installation process. Additionally, I have provided links to official websites where you can download Kali Linux safely.
- Troubleshooting Installation Errors
Some errors may occur during installation, but they can be fixed easily. To avoid common issues:
- Install Microsoft C++ to fix compatibility problems.
- Use VirtualBox to run Kali Linux without errors.
Once you install Kali Linux, your terminal will be ready to use.
Need Help?
If you have any questions, feel free to contact me via email or ask in the comments section.
Once again, please use Kali Linux legally. If you want to learn more, I highly recommend taking online classes from the resources I have shared.
Thank you! I am always here to help. 😊
More Information: Click Here
FAQ
What is Kali Linux used for?
Kali Linux Anyone can use it, including beginners, That is Kali Linux for beginners, government agencies, and even security professionals. However, it is mostly used by hackers, often for illegal activities like stealing people’s data.
Can I install Kali Linux on any computer?
Yes, Kali Linux can run on any computer, but the system should have good performance. It requires at least 4GB of RAM (8GB or more is better), a 64-bit processor, and at least 25GB of free storage for proper installation.
Thanks sir for all this information.
Thank you for offering such comprehensive and valuable information. Your website is truly exceptional.
Your blog intrigues my attention from beginning to end. I find myself pulled into every word you write.